• About
  • Recipes by topic
  • Vegan Recipes

lushesfood

~ luscious food from us lushes

lushesfood

Category Archives: Vegetarian

Killer sandwiches on homemade pain rustique

05 Wednesday Feb 2014

Posted by Zoli in bread, cheese, french, pain rustique, sandwiches, Vegetarian

≈ Leave a comment

Tags

brie, caramelized onions, fried egg sandwich, grilled cheese, homemade french bread, pain rustique, red pepper jam

sliced pain rustique

brie and caramelized onion sandwich Brie and caramelized onion with red pepper jam on pain rustique

ried egg and onion sandwich 
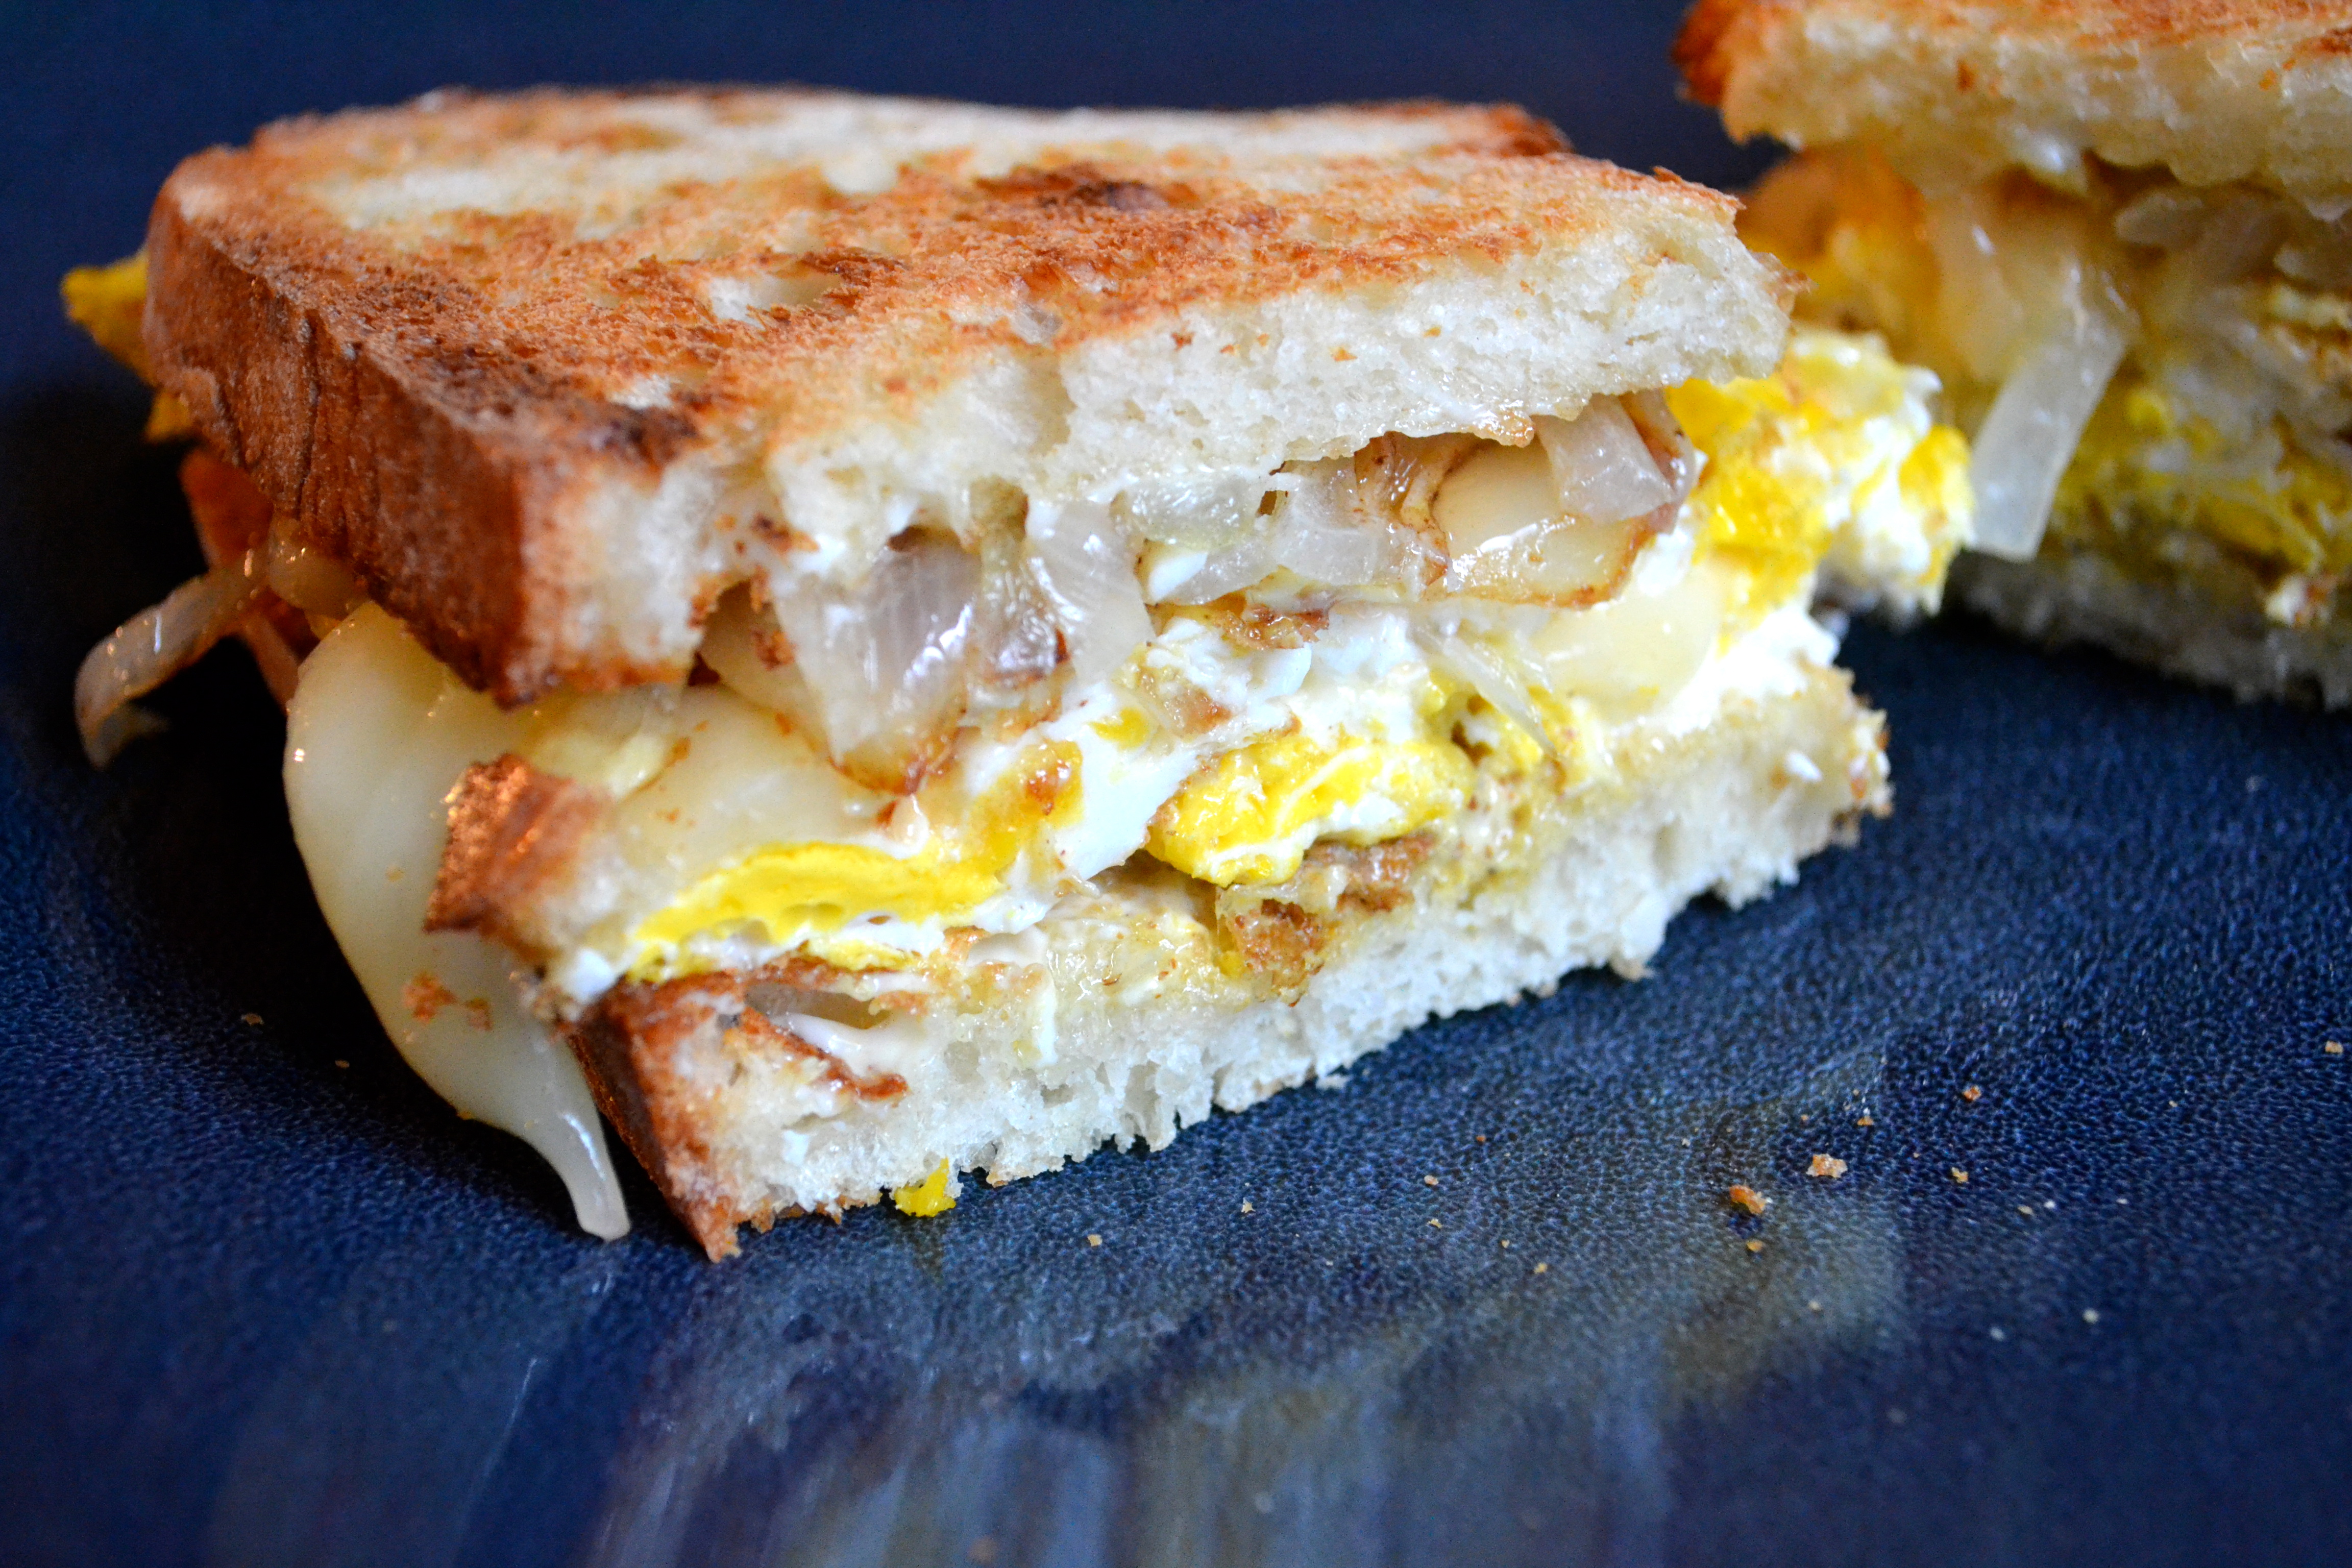
Fried egg and onion sandwich with hot mustard and sharp cheddar on pain rustique

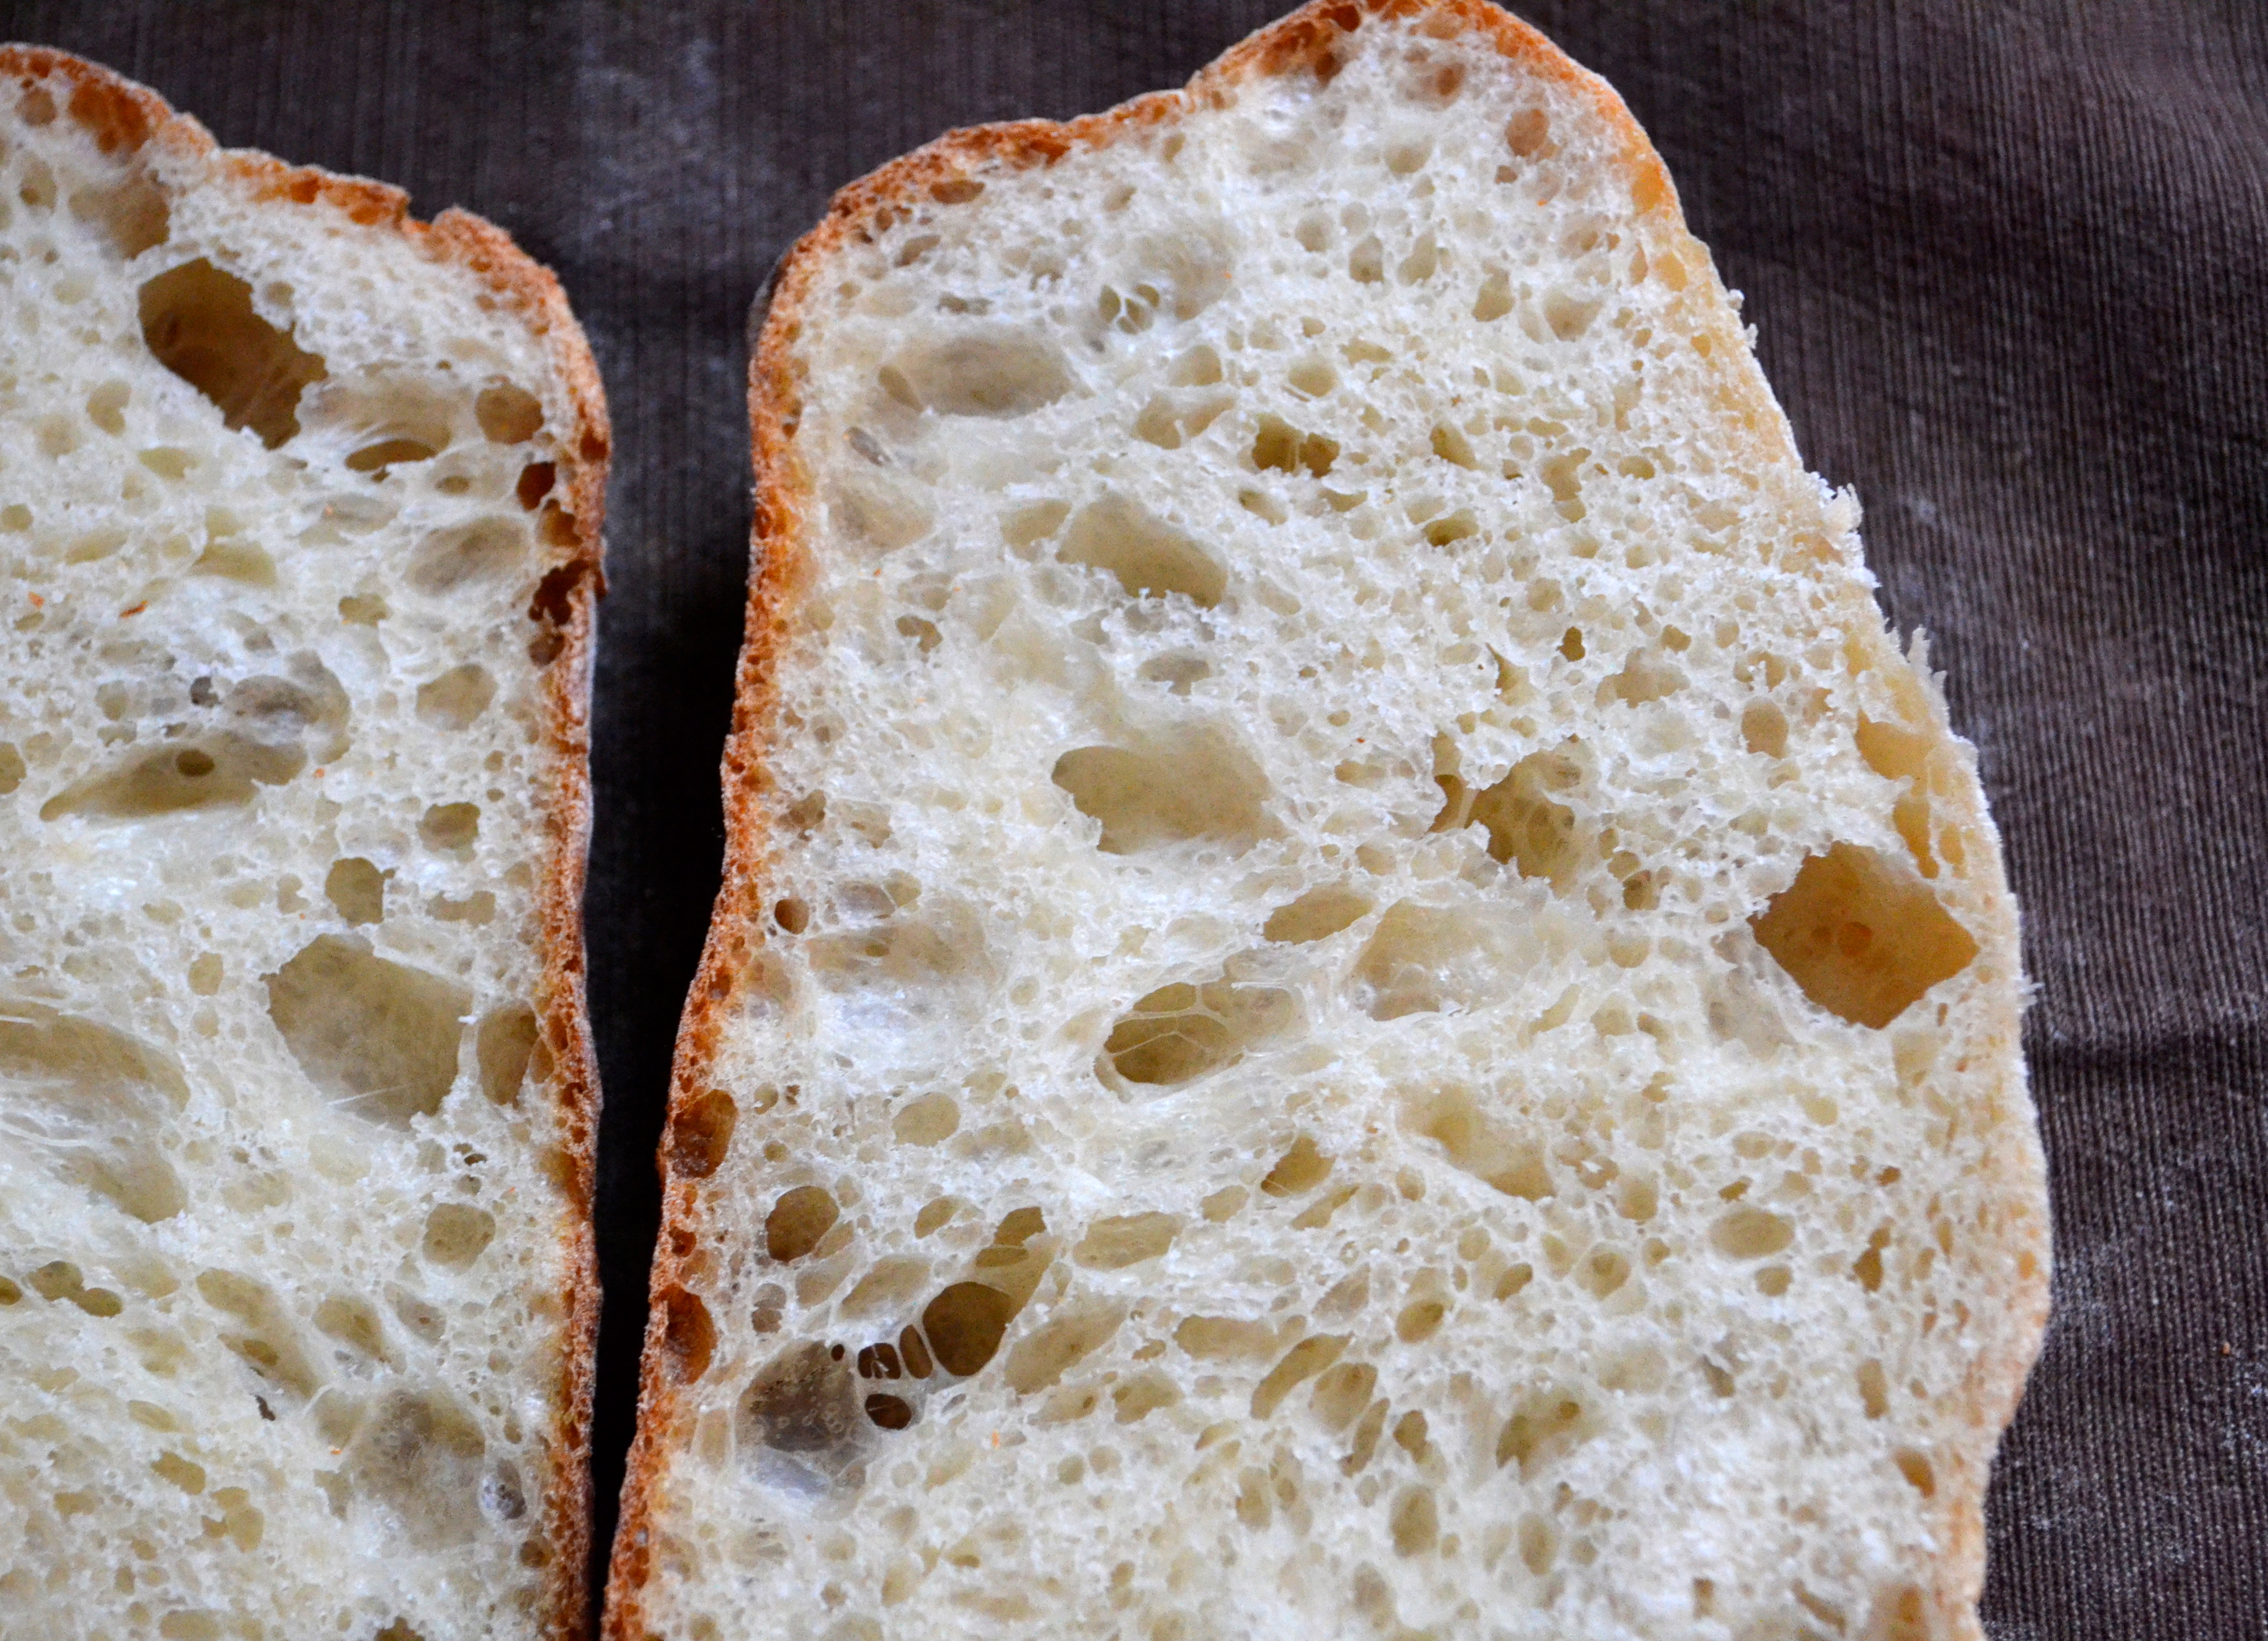
I’ve chosen this french bread as the recipe for my family’s daily bread. It’s a good artisanal bread for a beginner baker. You still need good flour, instant yeast, a mixer (optional, but recommended), concentration and time, time, time. But there isn’t much shaping and slicing and trickery to this bread. It’s not fragile like a ciabatta or hard to shape and slice like a baguette. It requires no sourdough starter or endless cold fermenting.

It looks gorgeous, keeps well, and makes for some killer sandwiches, or bruschetta or simple buttered toast.

Scroll down for some yummy sandwich ideas with this bread.

Pain rustique
adapted from Jeffrey Hamelman ‘Bread’
makes 2 medium loaves

For the poolish (make the night before):
1 lb or 3 5/8 cups bread flour, such as King Arthur
2 cups water
1/8 tsp instant yeast, such as SAF yeast

For the final dough:
1 lb or 3 5/8 cups bread flour
6.1 oz or 3/4 cup water
Poolish
1 tbs salt
1 1/2 tsp instant yeast

1) To make the poolish ahead of time: Add water, then yeast, then flour to a large mixing bowl and mix till smooth. Cover the bowl with plastic wrap and leave overnight–at least 12 hours and up to 16 hours.
2) Using a mixer, add the poolish from the night before, the final dough flour and water to a mixing bowl. Don’t add the second yeast or the salt yet. Mix on first speed briefly—until everything is pulled together into a big shaggy lump.
3) Cover with plastic wrap and leave to rest for 20 or 30 minutes.
4) Sprinkle the salt and yeast over the dough and mix on the second speed for 1 1/2 to 2 minutes. The dough should look more like bread dough now.
5) Cover and let rise for a total of 70 minutes or longer, with two folding times. Make the first fold after 25 minutes of rising. Scrape the dough onto a clean floured counter and pull one third of the dough out and fold over. Then turn and fold the other side the same way. Repeat with the top and bottom sides. Don’t rip the dough. Just gently stretch and fold. Cover and leave to rise.
6) Repeat the same folding technique after 50 minutes. You should notice the dough becoming softer, airier and more pliant.
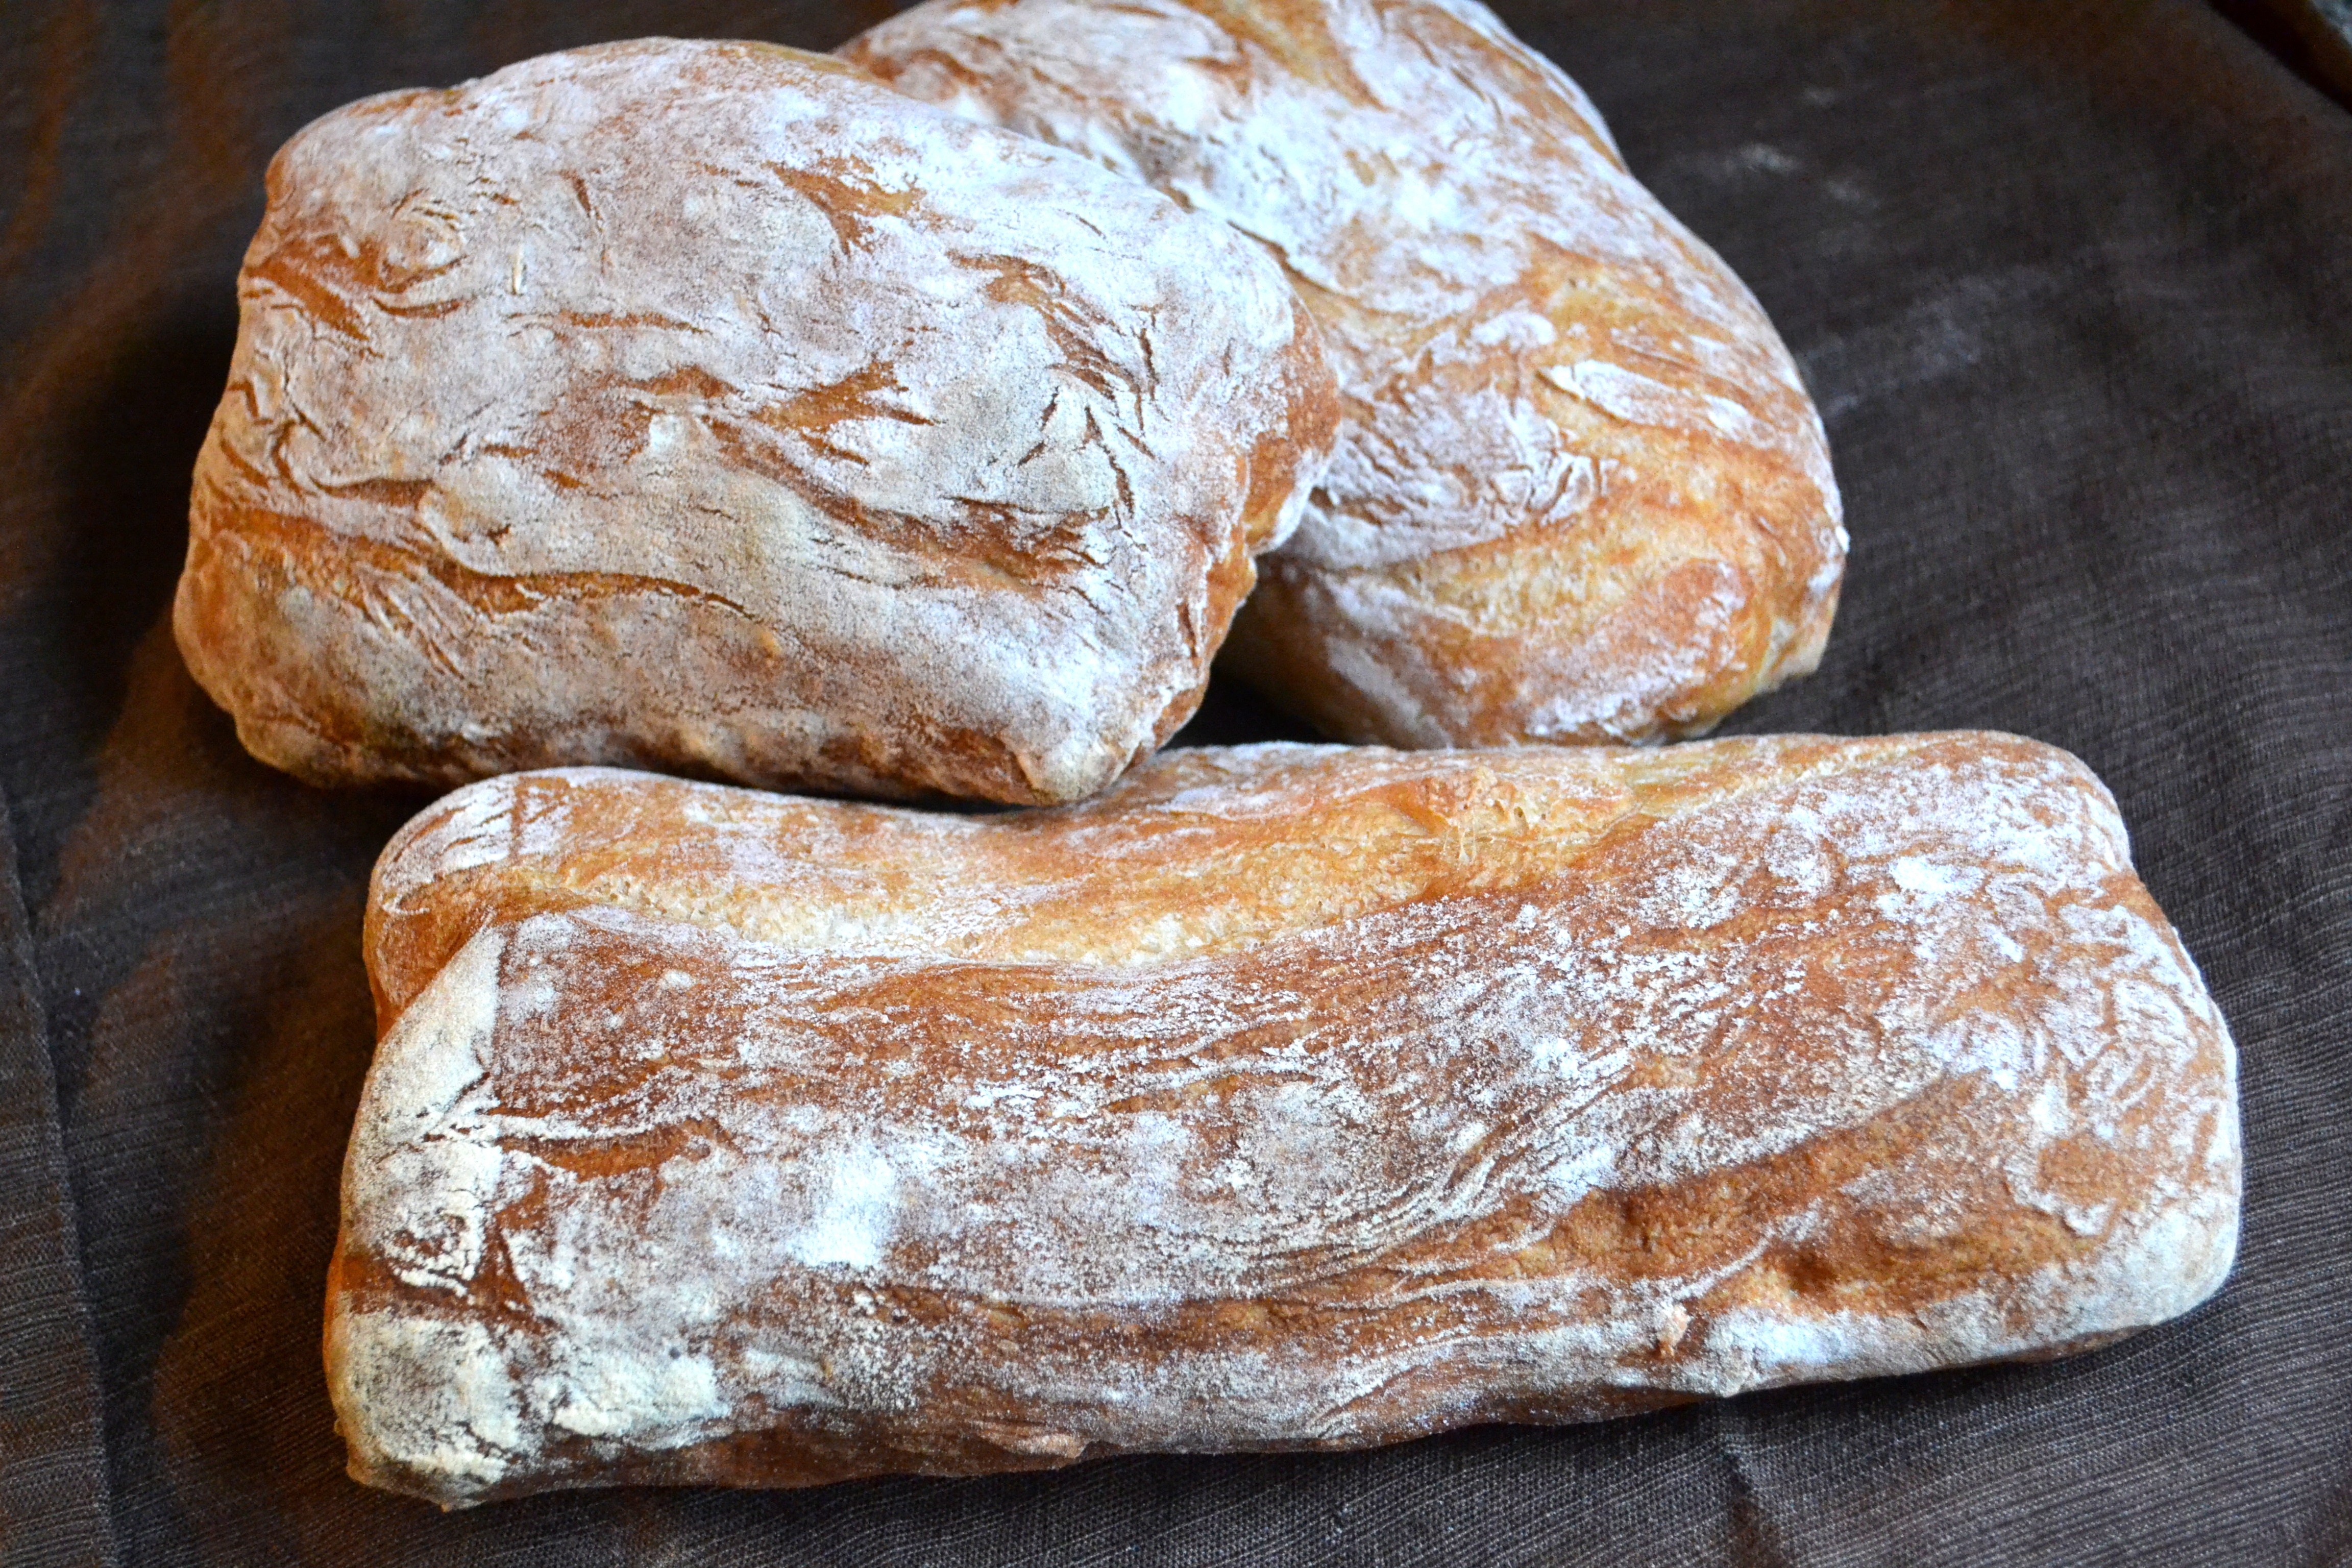
7) Let rest for another few minutes (Or longer. I had to leave this bread for an extra hour while I ran an errand and it was fine.) and then scrape the dough out onto a floured counter. Gently spread it out a little so that you can slice evenly down the middle creating two equally shaped ovalish loaves.
8) Cover and leave to proof for 25 minutes. Ideally in a warm location.
9) Preheat the oven to 460F and if you have a baking or pizza stone, put it into the oven.
10) Gently flip the two loaves of dough over so that flour sides are up. Slash quickly down the center of each. This will allow you to control the way the dough expands in the oven.
11) Pre-steam the oven before you add the dough. You can use a spray bottle or put in a little pan of water. If you have a peel, use this to transfer the loaves to the hot oven. I do not, so my technique is to quickly pull out the hot baking stone, transfer the loaves to it and quickly put it back into the oven.
12) Add a little more steam as soon as you put the cold bread dough into the hot oven. Bake at 460F for about 35 minutes. After 20 minutes, open the oven door a crack to finish baking the bread in a dry oven.

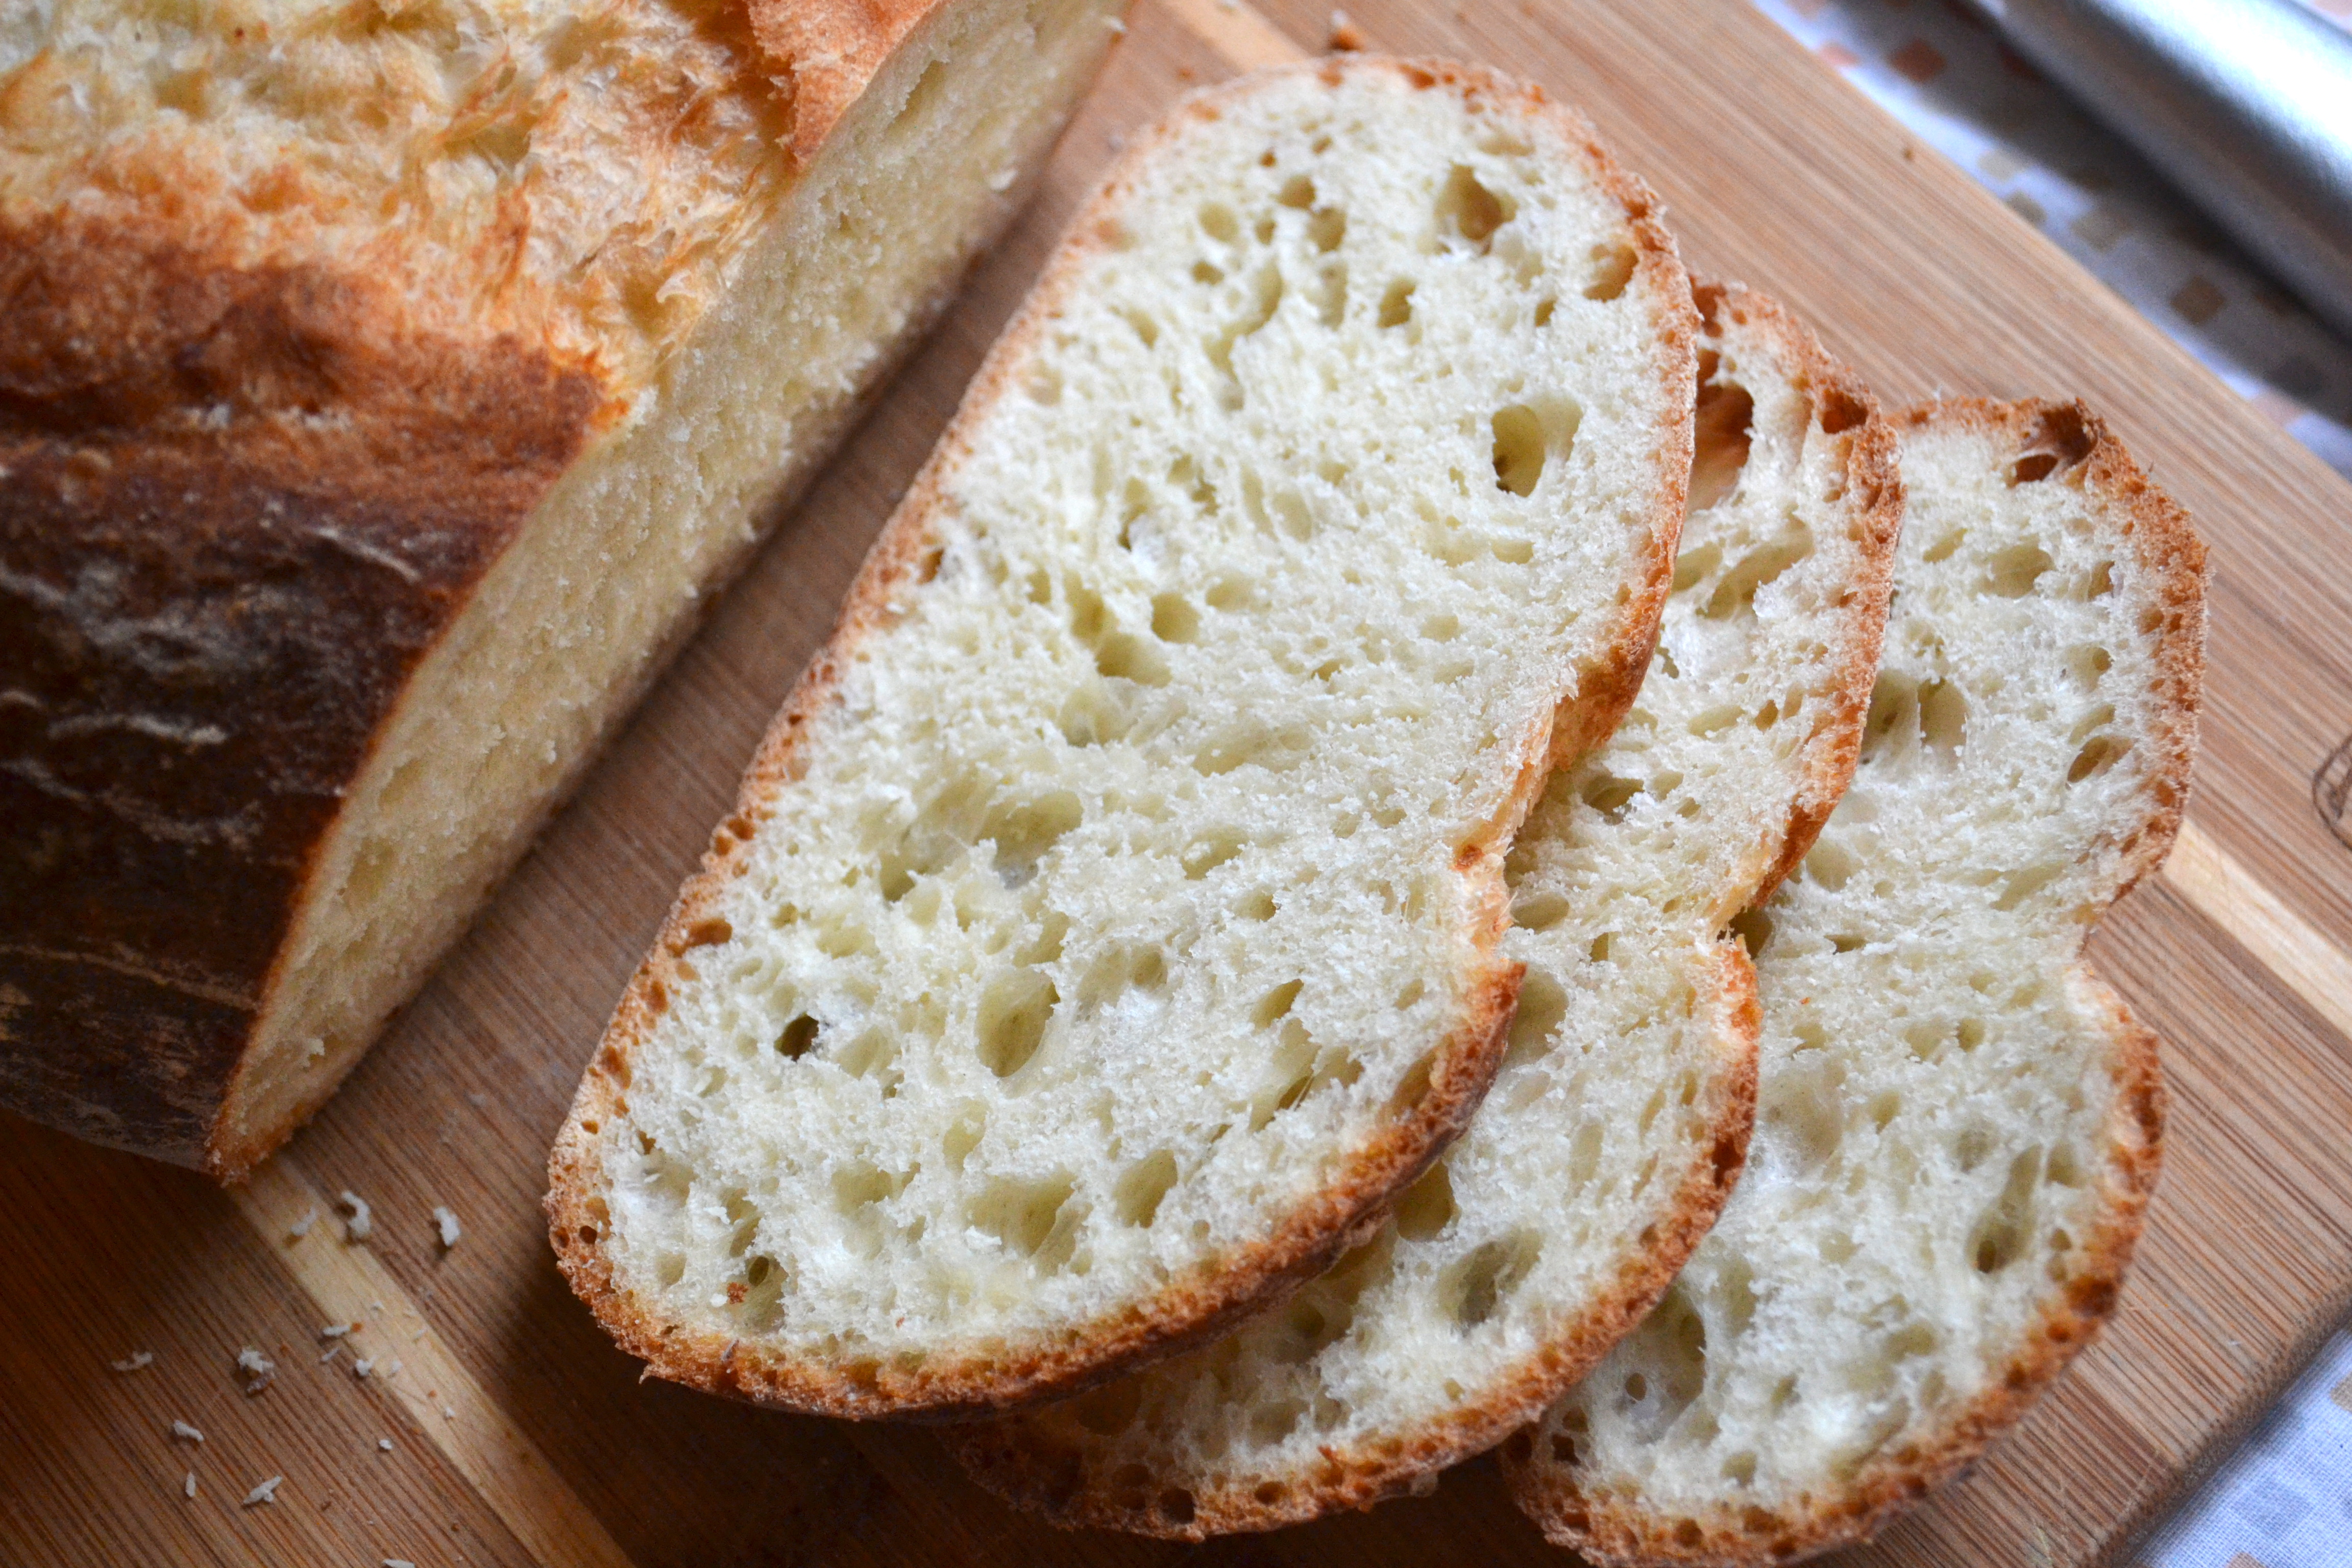
I had two lovely loaves, but five kids were in my kitchen having just finished playing in the snow and they ate an entire loaf of bread themselves! This is the one I kept for myself:

pain rustique

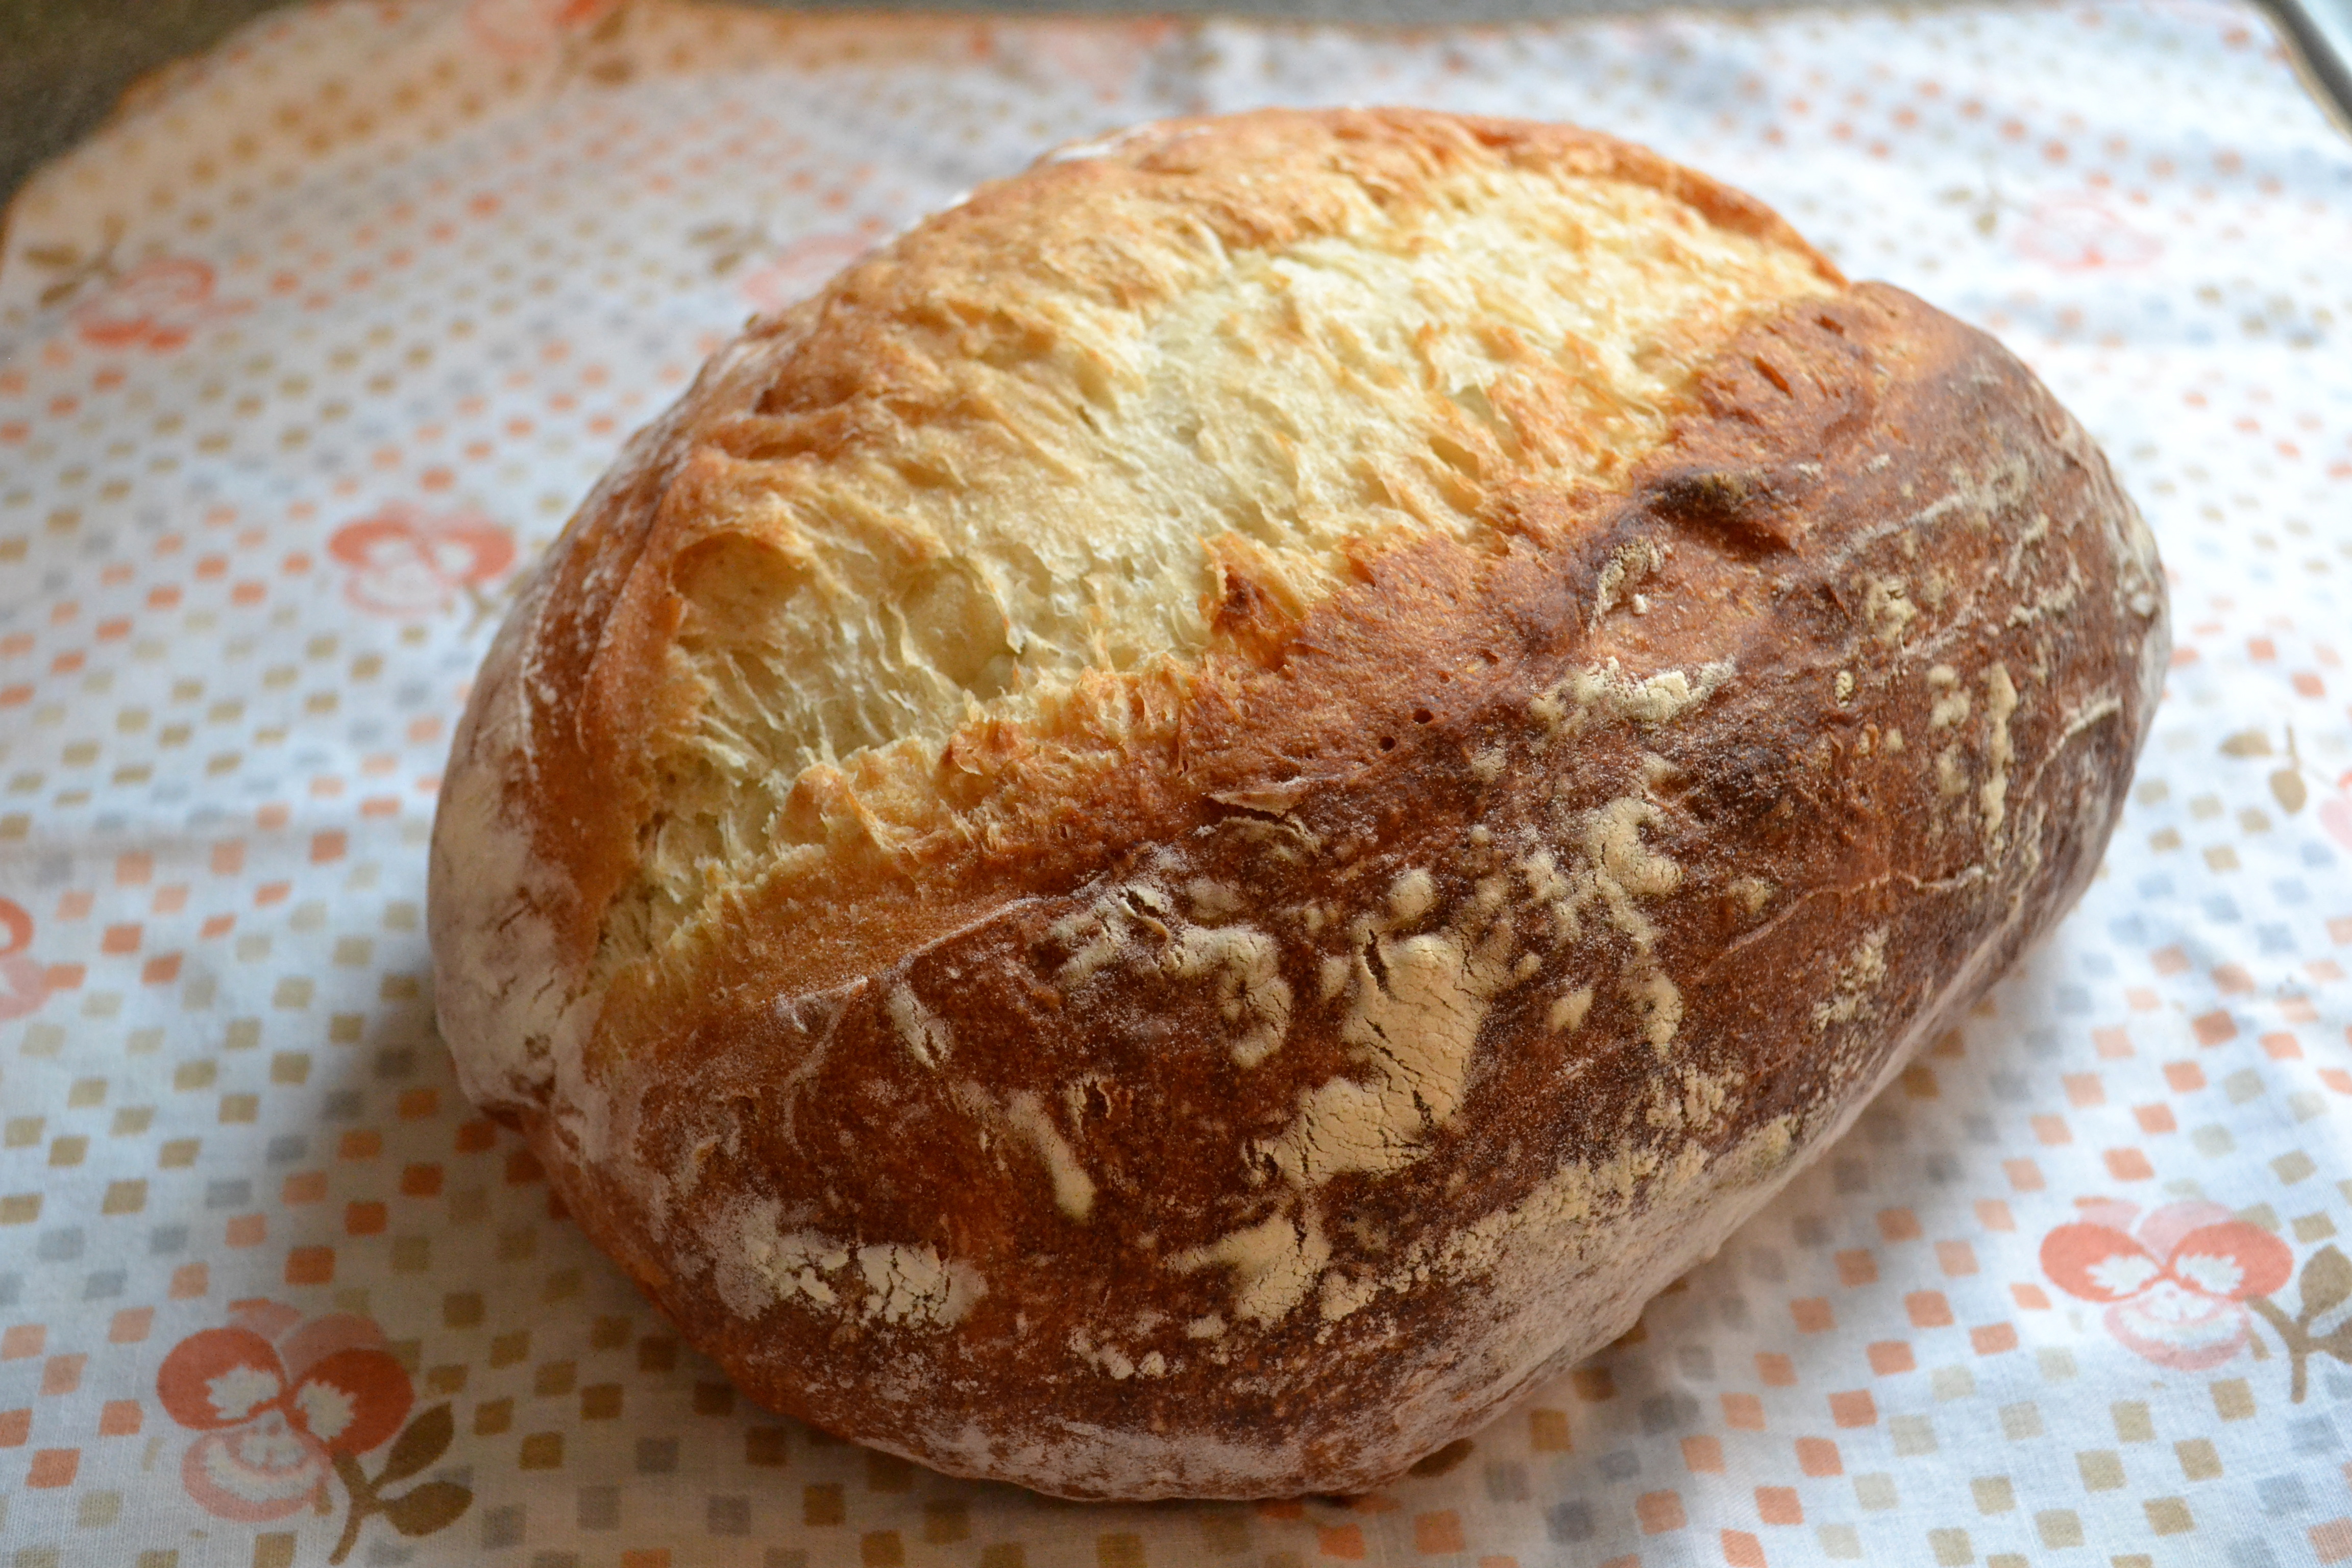
This beautiful bread makes me so happy. Damn it looks good.

Hubby pestered me (Not really! He shoveled our sidewalk and driveway for four hours and I offered to make him some food) for some grub and I made him not one, but two sandwiches with my almost too beautiful to eat pain rustique bread. It had to be two because he wanted my totally-should-be-world-famous fried egg and onion sandwich but he wanted it with caramelized onions. He has fallen hard for caramelized onions. I’m sorry chipotle in adobo sauce, caramelized onions are my new secret weapon. So anyway, I didn’t really want to put the two together and decided on splitting them between two different awesome sandwiches. This one, the diner-style fried egg sandwich I invented when I was sixteen, has been impressing people (it’s true!) ever since. Especially on a bagel.

Fried egg, cheddar and onion sandwich
This is actually awesome
2 eggs
1/8 or 1/4 sliced white onion
1 bagel or 2 slices good rustic bread
mature or sharp cheddar
a lot of butter
mayo
hot mustard or whole grain mustard
fresh ground salt and pepper

1) Melt a good chunk of butter in a small fying pan and gently fry the onion till cooked and browning.
2) Push the onion to one side of the frying pan, add a little more butter, and crack two eggs in the pan. Add salt and pepper and break the yolks. Flip over and cook the egg thoroughly. Turn off the heat and add slices of cheddar on the egg to melt.
3) Toast the bread or the bagel.
4) Slather the bread with plenty of mayo and spicy or wholegrain mustard, then add the egg, cheese and onions and another grind of pepper if you like.

fried egg and onion sandwich

fried egg and onion sandwich

Brie, caramelized onion and red pepper jam grilled cheese
2 slices pain rustique or other awesome bread
Sliced brie, enough to cover the bread
red pepper jam or thai chili sauce
caramelized onions
butter

1) Add all the fillings to the bread and then generously butter each outside slice of bread. Grilled cheese is not the time to skimp on the butter
2) Cook each side of the sandwich till golden brown and inside melted and heavenly. Arugula or rocket lettuce would be great in this sandwich as well.

brie and caramelized onion sandwich

brie and caramelized onion sandwich

Share this:

  • Share on Pinterest (Opens in new window) Pinterest
  • Share on Facebook (Opens in new window) Facebook
  • Share on X (Opens in new window) X
  • Email a link to a friend (Opens in new window) Email
  • Print (Opens in new window) Print
  • Share on Tumblr (Opens in new window) Tumblr
  • More
  • Share on LinkedIn (Opens in new window) LinkedIn
  • Share on Reddit (Opens in new window) Reddit
Like Loading...

Bread adventures: ciabatta

29 Wednesday Jan 2014

Posted by Zoli in bread, ciabatta, italian, the basics, vegan, Vegetarian

≈ 8 Comments

Tags

ciabatta, fresh bread, homemade ciabatta, how to make ciabatta, italian bread

homemade ciabatta

homemade ciabatta

The first time I tasted ciabatta was in 1997. I was 22 years old, studying in London, and my boyfriend and I shared a 2-bedroom house with a lonely grey-haired Italian baker. Every night, before hiding in his room till his early morning shift, he’d bring home the ciabattas that hadn’t sold. In the mornings before class, I’d brew myself espresso, heat up milk for a strong white coffee, and eat the ciabatta with butter and marmite. It’s been my favorite ever since.

So this obsessive bread baking that I have been engaged in… My baguettes taste delicious but they don’t look the way they should. Shaping them properly and slicing along the top at just the right angle to make them expand is challenging. How surprised I was, when I read up on making ciabatta, that there is virtually no shaping, hardly any folding and (joy!) no slicing. The trick with this bread seems to be ensuring that it keeps it’s fragile risen state–especially when transferring to a hot steaming oven.

Things you will need before making ciabatta or baguettes:
1. A way to steam your oven, such as a clean spray bottle.
2. Nice fresh flour. Everyone I have read recommends King Arthur flour, which I have started using. I have also baked with gorgeous fresh local flour, but it’s a little on the pricey side for daily use.
3. Instant yeast. I use SAF. Half of it is in a jar in the freezer and half of it is in a jar in the fridge. I am GETTING through this stuff!
Saf instant yeast
4. A kitchen aid or other mixer is a lot of help, especially for the sticky breads.
5. A bread scraper. Oh how I love my bread scraper.
6. Bakers linen is on my wish list. I have a baguette baking tray which works great, and I use baking parchment sometimes. But I will be purchasing some bakers linen soon.
7. A baking stone or pizza stone.
8. A scale. I don’t have one of these yet!

I am no expert on ciabatta, so please read up on making artisanal breads, as I did. If you have never tried bread like this, definitely research how to fold and shape bread. This recipe comes from Jeffrey Hamelman’s book ‘Bread’. He goes into more detail naturally. This is for ciabatta made with a stiff biga.

Ciabatta with stiff biga
makes 3 to 4 smallish loaves
Start the day before you want the bread

For the biga
6.4oz or 1 1/2 cups bread flour
3.8oz or 1/2 cup water
1/8 of a tsp of instant dry yeast

For the final dough
1lb, 9.6oz or 5 3/4 cups bread flour
1lb, 3.6oz or 2 1/2 cups water
1 Tbs salt
1 1/4 tsp instant dry yeast
biga

1) Make the biga the night before. Add yeast to the water, then add the flour and mix until just combined to a dry, dense biga. Add a few drops of water if it needs it. I mixed this by hand. Cover with plastic and leave for 12-16 hours in a warm place to rise. My kitchen was very cold so it didn’t rise enough. In the morning, I put it into a slightly warm oven for a couple hours.
2) Add all the ingredients except the biga to a kitchen aid mixing bowl and mix on the first speed for 3 minutes. As the dough is mixing and coming together, add the biga in pieces to incorporate it into the dough. Then mix on the second speed for 3 to 4 minutes. The dough will be sticky.
3) The dough will rise for 3 hours. After the first hour, scrape the dough onto a floured surface for folding. It is very sticky so have enough flour on the counter and fold quickly before it sticks. Fold one side in, then the next. Then turn the dough and fold the other two sides. Ciabatta is not shaped at the end so the folding has to be done correctly to help the bread structure. Place the dough back in the bowl and cover.
4) After two hours, flour the counter and fold again.
5) Divide the dough into loaves. Flour the counter (again, with plenty of flour) and scrape the dough onto the counter. Lightly flour the top surface of the dough. Have a large, floured bread board ready nearby to place the loaves on. Cut a strip of dough, about 4 inches wide and then cut the strip again to make two smaller rectangular loaves. If the loaves are more square than rectangle, gently stretch them out a little. Place the loaves on the floured bread board and continue cutting the rest of the dough into small loaf shapes.
6) Cover the dough with bakers linen or plastic and leave to proof for 1 1/2 hours.
7) Preheat the oven to 460F with a baking stone in it.
8) The next step will be transferring the fragile ciabatta loaves to the hot oven filled with steam. Before you put them in the oven, have steam already going (using a spray bottle) and then spray more water again once all the loaves are in. Take the plastic or bakers linen off the loaves and using one hand, quickly and gently flip the ciabattas upside down without putting dents into them. Then use two hands to gently push in and pick up both ends and transfer them to the peel or to a baking tray. If you have a peel, this is the time to use it! I don’t so I put half the ciabattas directly on the baking stone and half onto a baking tray.
9) Slide the loaves off the peel and load them into the oven, or (like me) place the baking tray into the oven and don’t forget to steam. I put some of the loaves onto a hot baking stone by quickly taking it out of the oven, loading the ciabatta onto it and quickly putting it back into the oven.
10) Larger loaves will bake for about 35 minutes. Mine were smaller and were done in 25 minutes. The loaves at the top of the oven got dark a little too soon so I turned the oven down to 430 and moved them to a lower rack in the oven. I let them get a nice deep golden color. If you take ciabatta out too soon, says Jeffery Hammelman, the water moisture in the bread will soften the crust and you won’t get the nice crispy ciabatta-ness.

Good luck! Also, any bread experts out there, send me your advice or wisdom! This was my first time making ciabatta, and I think the inside structure wasn’t quite ‘holey’ enough, but I’ll keep chugging along till I get there.

homemade ciabatta

Share this:

  • Share on Pinterest (Opens in new window) Pinterest
  • Share on Facebook (Opens in new window) Facebook
  • Share on X (Opens in new window) X
  • Email a link to a friend (Opens in new window) Email
  • Print (Opens in new window) Print
  • Share on Tumblr (Opens in new window) Tumblr
  • More
  • Share on LinkedIn (Opens in new window) LinkedIn
  • Share on Reddit (Opens in new window) Reddit
Like Loading...
← Older posts
Newer posts →

Enter your email address to follow this blog and receive notifications of new posts by email.

Join 330 other subscribers

Recent Posts

  • Vegan pho
  • Sweet and spicy plantain
  • Vegetarian/Vegan Bánh Bèo – Savory steamed rice cakes
  • Stuffed arepas
  • Arepas

Recipes

  • breakfast
  • British
  • brunch
  • cheese
  • Chinese
  • Columbian
  • comfort food
  • cookies
  • dessert
  • drinks
  • french
  • gluten free
  • Guyanese
  • healthy
  • indian
    • dahl
  • italian
  • Japanese
  • kids
  • kids lunchbox ideas
  • Korean
  • luxurious leftovers
  • Malaysian
  • Mexican
    • tacos
  • Middle Eastern
  • party bites
  • pasta
    • pasta sauce
    • rice noodles
    • soba noodles
    • udon noodles
  • peanut free
  • pizza
  • pizza sauce
  • Polish
  • quick and awesome
  • salad
  • sandwiches
  • Sauces
  • Singaporean
  • snacks
  • soup
  • spanish
    • tapas
  • spices
  • Street food
  • Tea
  • tex mex
  • Thai
  • the basics
    • bread
      • baguette
      • ciabatta
      • English farmhouse loaf
      • flatbread
        • chapati
        • paratha
      • fougasse
      • naan
      • pain rustique
      • pita
      • roti
      • rye sourdough
      • sandwich loaf
    • crepes
    • eggs
      • omelettes
    • homemade cheese
    • pastry
    • rice
      • basmati
        • lemon rice
        • pulao rice
      • jasmine rice
      • risotto
  • tomato sauce
  • Uncategorized
  • vegan
  • Vegetarian
  • Venezuelan
  • Vietnamese

Archives

March 2026
M T W T F S S
 1
2345678
9101112131415
16171819202122
23242526272829
3031  
« Jul    
© copyright lushesfood 2013

Blog at WordPress.com.

Privacy & Cookies: This site uses cookies. By continuing to use this website, you agree to their use.
To find out more, including how to control cookies, see here: Cookie Policy
  • Subscribe Subscribed
    • lushesfood
    • Join 330 other subscribers
    • Already have a WordPress.com account? Log in now.
    • lushesfood
    • Subscribe Subscribed
    • Sign up
    • Log in
    • Report this content
    • View site in Reader
    • Manage subscriptions
    • Collapse this bar
 

Loading Comments...
 

    %d